My Upgrade
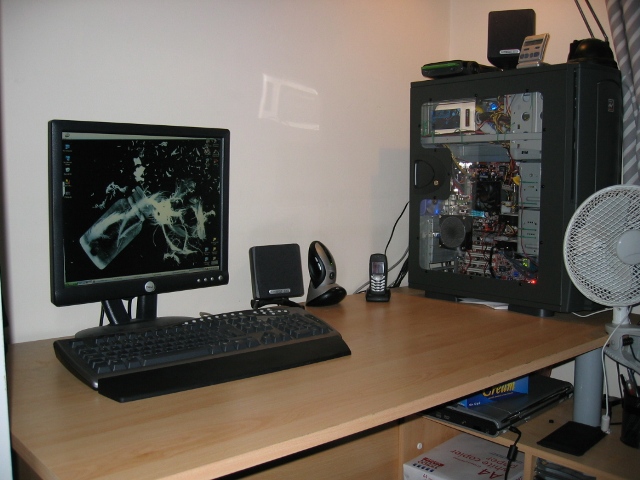
I recently performed a major upgrade on my system. I upgraded from the system
pictured below. I chose to do this because I felt that it was time for me to
upgrade my graphics card to allow me to play half life2 and its multiplayer spin
offs at higher settings. Also the new nforce4 chipset promised to be a big
improvement over my existing VIA KT880PRO which had been less than perfect in
some respects with common problems such as my Lan connection dropping out and
one of the memory slots being a little temperamental. The system had been in the
same basic state for around 4 months since I initially got athlon64. More info
on the VIA KT880PRO setup are outlined here.
| CPU | AMD Athlon 64 3500+ (Newcastle) |
| Mainboard | Abit AV8 (VIA KT880PRO) |
| Graphics | Sapphire Radeon 9800XT |
| Memory | 2x512mb OCZ Gold PC3700 (7-3-3-2.5 2.7v) |
| Cooling | AMD stock heatsink (upgraded to XP-120 and 120mm YS-tech 1 week before main upgrade) |
| 4 Thermaltake Redeye 80mm LED fans (2 intake, 2 exhaust) + 1 Chieftec 80mm fan (side panel intake) | |
| Storage | 2x74gb western digital raptor Raid 0 |
| PSU | 450W Globalwin Sapphire Supersilent 19DbA |
| Removable Storage | Plextor DVD-Rw, Floppy Drive |
| Case | Chieftec Scorpio |
The upgraded spec will be
| CPU | AMD Athlon 64 3500+ (Newcastle) |
| Mainboard | DFI LAN Party NF4 SLI-DR |
| Graphics | ATI Radeon x850 XT PE (ATI pre release sample) |
| Memory | 2x512mb OCZ Gold PC3700 (7-3-3-2.5 2.7v) |
| Cooling | Thermalright XP-120 with 120mm YS-tech |
| 2 Akasa 120mm case fans | |
| Storage | 2x74gb western digital raptor Raid 0 |
| PSU | 480W Antec Neo Power |
| Removable Storage | Plextor DVD-Rw |
| Case | Akasa Eclipse-62 |
First off the deliveries
First thing to arrive was the new cooling kit. Thermalright XP-120 and YS-tech 120mm fan assembled for the photo before test mounting to AV8 couple of weeks before main upgrade.
.jpg)
Second the Motherboard, and fan controller arrive
.jpg)
contents of the boxes
.jpg)
.jpg)
A couple of days later new case, window side panel, 2 120mm akasa fans, molex to 3 pin fan converter and PSU
.JPG)
.JPG)
.JPG)
and later that day by royal mail
.JPG)
So with everything together, construction began. Firstly the motherboard was attached to the motherboard tray.
.JPG)
next the PSU was mounted, with a small strip of foam to help prevent vibration where I thought there might be a danger of it.
.JPG)
All new parts (exc. graphics card) mounted and ready to go (fan controller is also inserted into bottom drive bay before this point.
.JPG)
Test run of mobo, fans and fan controller after PSU had been tested using an antec PSU tester.
.JPG)
Next, the new graphics card was mounted, along with one stick of ram. Only one stick was used until the bios was flashed to eliminate some potential problems I had heard about when using 2 sticks of some types of ram on the shipping bios.
.JPG)
Now time to take apart the old setup. One final shot before the innards are removed.
.JPG)
Both systems next to each other on my rather makeshift workbench more commonly known as a bed.
.JPG)
Parts transfer complete, first power on to test boot and graphics. It even works first time!!
.JPG)
Floppy drive connected to flash to latest bios which I had already downloaded
.JPG)
And finally, the successful windows installation
.JPG)
And most recent pics with cables tidied somewhat, new UV tubes installed, UV sata cables, UV IDE cables and other stick of memory.
.jpg)
same pic without flash
.jpg)